2025-01-07 14:02 7941 read
Genlogin Antidetect Browser:
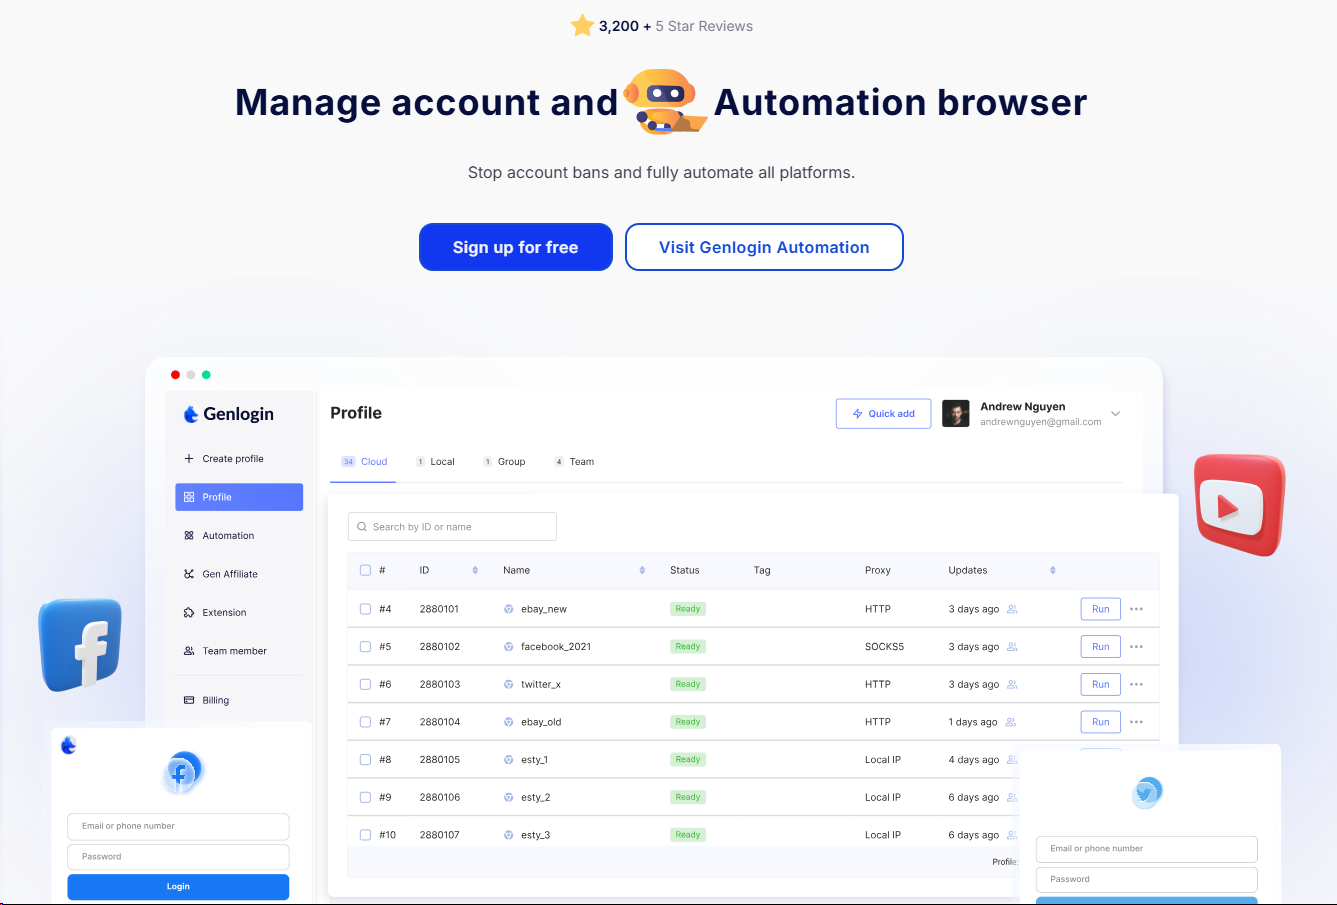
Antidetect Browser, designed for multi-account management and anti-blocking, is widely used in cross-border e-commerce, social media management, advertisement placement and other scenarios. By simulating the Antidetect Browser fingerprints of real users, Genlogin can effectively prevent platforms from recognizing multiple accounts as the same user, thus avoiding the risk of account blocking. It provides a complete fingerprint switching function, including the simulation of operating system, screen resolution, use Proxies and other parameters to ensure that each account has an independent identity.
In addition to the traditional Antidetect Browser features, Genlogin's strength lies in its high level of security and flexibility for large-scale, multi-platform account operations. Whether you are a cross-border e-commerce seller, a social media operator, or a multi-account advertiser, Genlogin provides strong support to help users conduct online marketing and business management more securely and effectively.
Click here to visit the official Genlogin website.
Bestproxy Residential Proxies:
BestProxy is a leading Proxy IP service provider focused on providing five core products: Rotating Residential Proxies, Static Residential Proxies, Unlimited Residential Proxies, Long Lasting ISP Proxies and Static Data Center Proxies.
Covering more than 200 countries and regions around the world, with more than 80 million high-quality IP resources, BestProxy has a success rate of more than 95% and supports unlimited concurrent connections and bandwidth usage.
Our proxies solutions are widely used in cross-border e-commerce, ad verification, data collection and multi-account management scenarios, helping enterprises optimize their operations and drive business growth with excellent stability, efficient performance and professional customer support.
Click here to get free Bestproxies Proxies traffic.
Step 1: Login to BestProxy Website
1. Open the BestProxy website and click "Get Started" in the upper right corner, or click here.
2. There are two ways to register: signing up with a Google account or registering with an "E-mail address".
To sign up with your Google account, click "Sign up with Google Account", and select the Google account you want to sign up with, then click "OK" to sign up automatically.
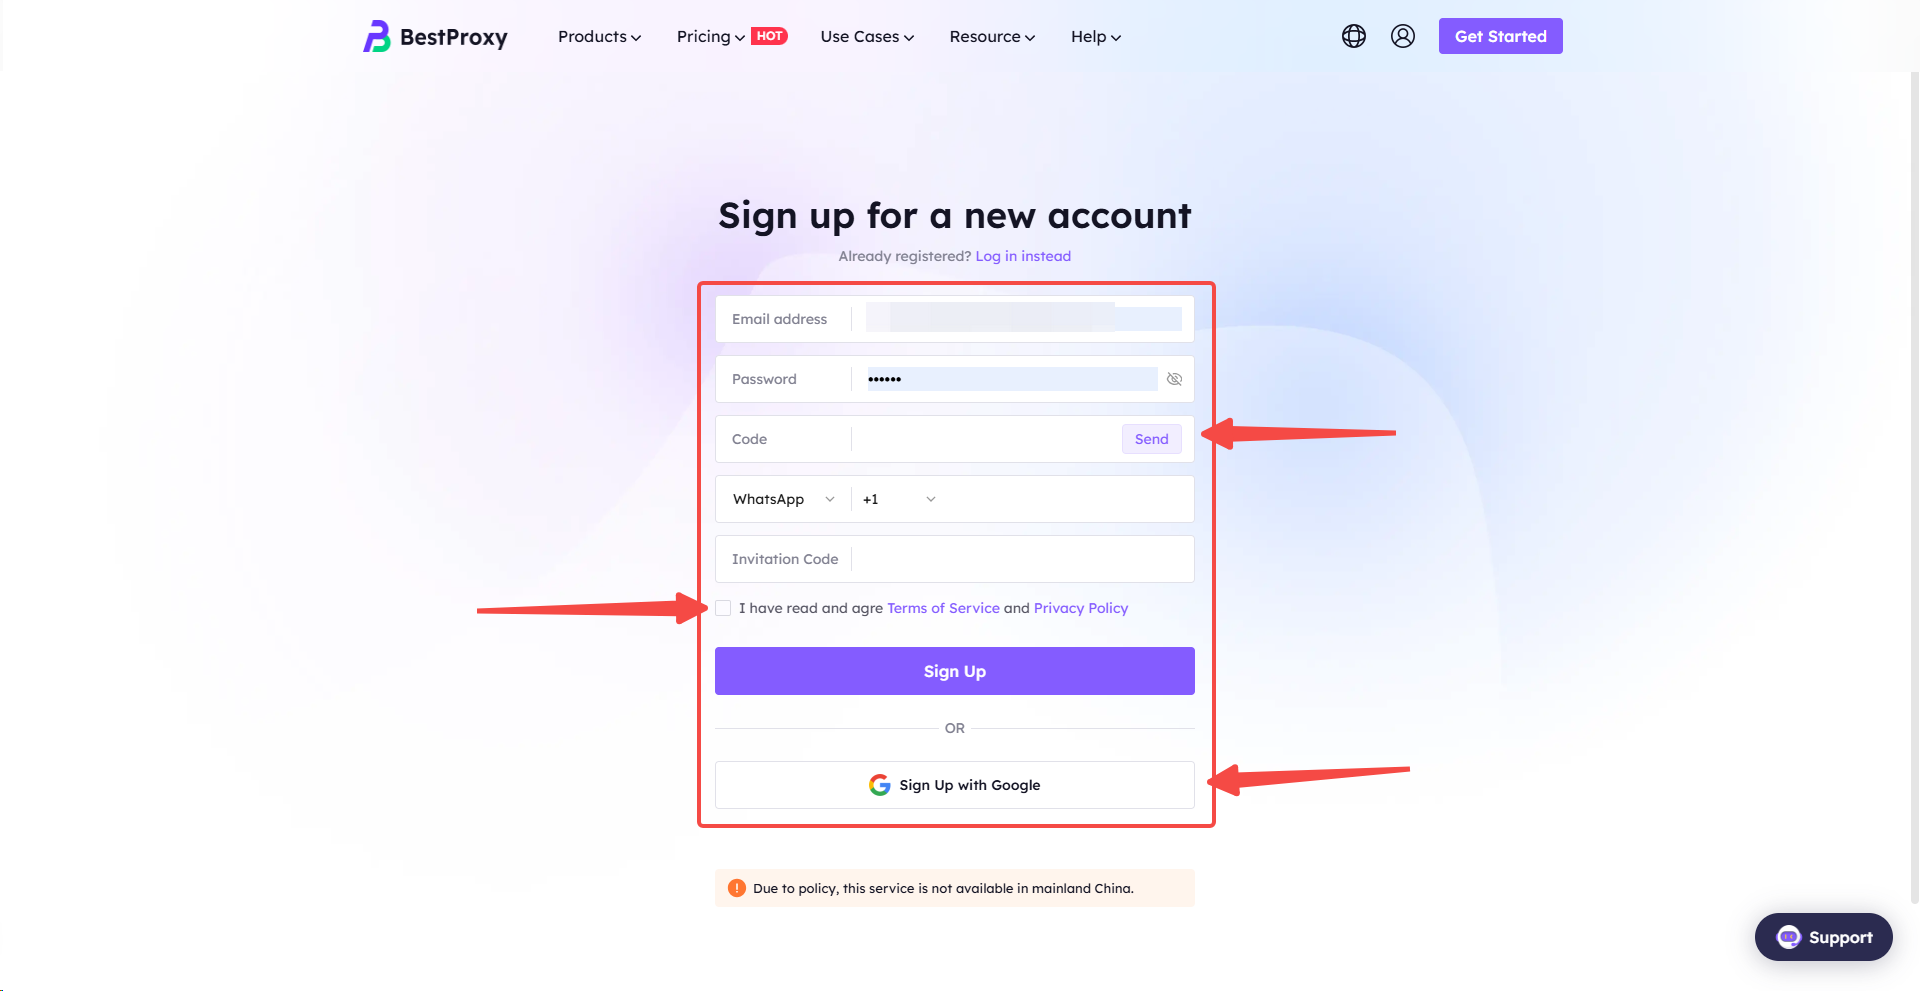
To register using your e-mail address:enter your e-mail address, click "Send", enter the verification code you received from your e-mail address, and set the password you want to use. Then you can log in with the same e-mail address and password you used to register.

Step 2: BestProxy Proxies IP Extraction
BestProxy has two ways to extract Proxies: User Auth & Pass Extraction and API Extraction. Here is an example of Rotating Residential Proxies Accounting & Pass Extraction.
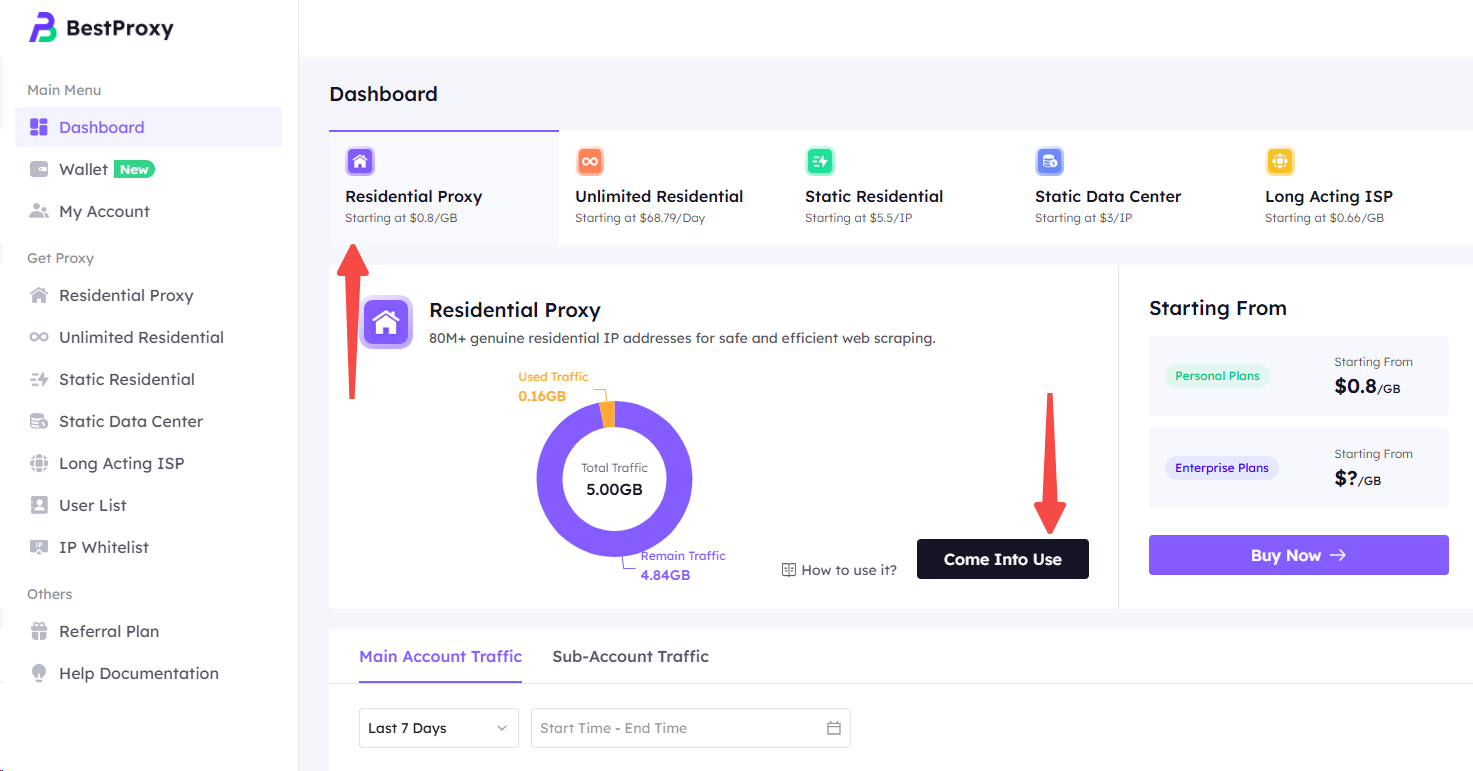
1. First, log in to the BestProxy website, then click your username in the upper right corner to enter the Personal Center interface below.

2. Once inside, select "Residential Proxy" and click "Come Into Use".
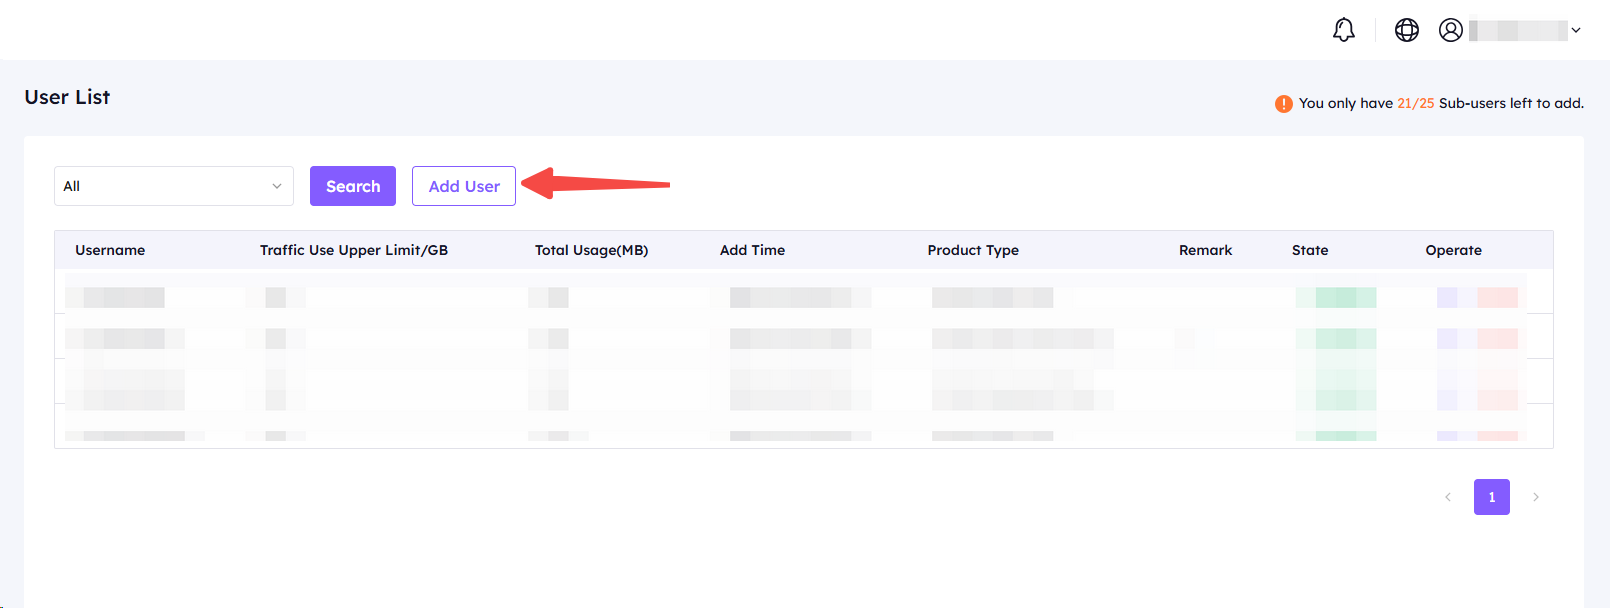
3. Before using “User & Pass Auth” extraction, you need to add sub-users, click "Add User".
4. After jumping to the list of users, click "Add User" again.
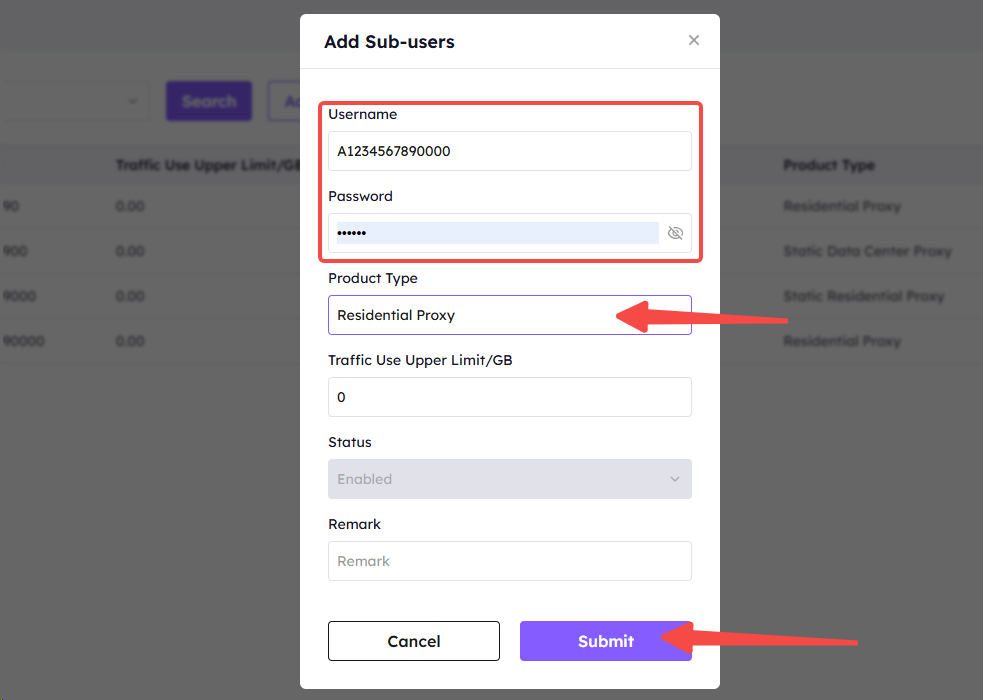
5. After clicking on it, the "Add Sub-users "window will pop up, then enter your username and password, select Residential Proxy, set the traffic use upper limit, 0 means no upper limit, and finally click "Submit".
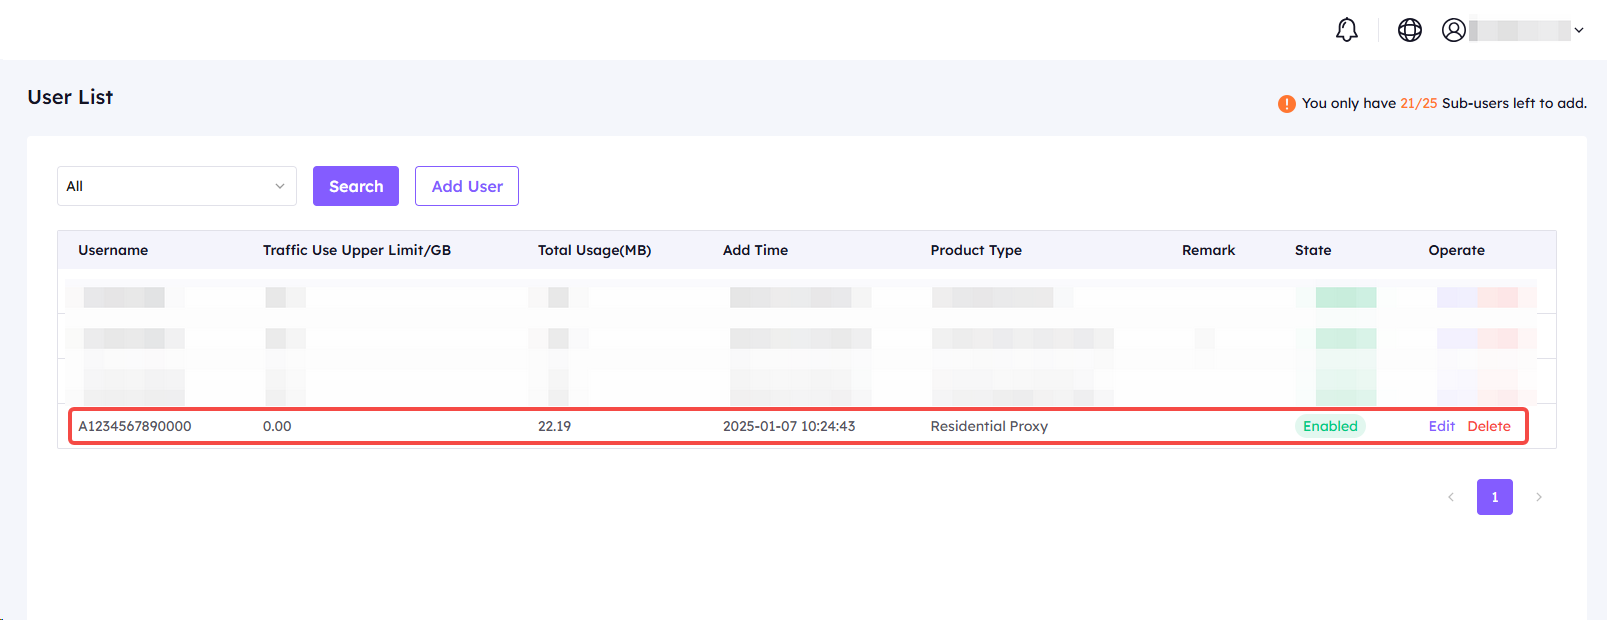
6. This successfully adds a sub-user, which you can also edit and delete on the far right.
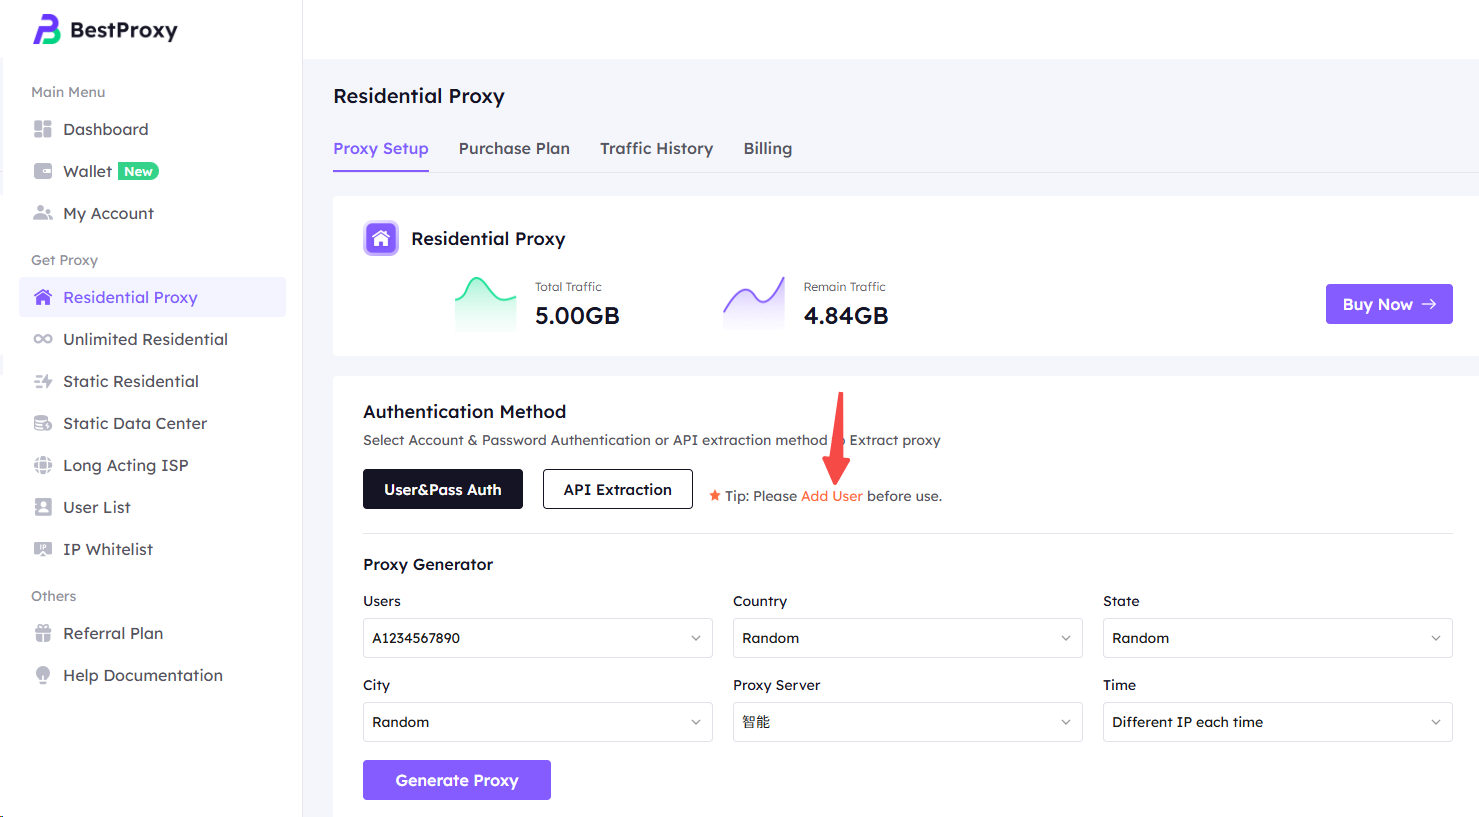
7. Go back to Residential Proxy User & Pass Auth extraction page, click on "Residential Proxy", click on "Account Password Authentication", and select the sub-user you just created.
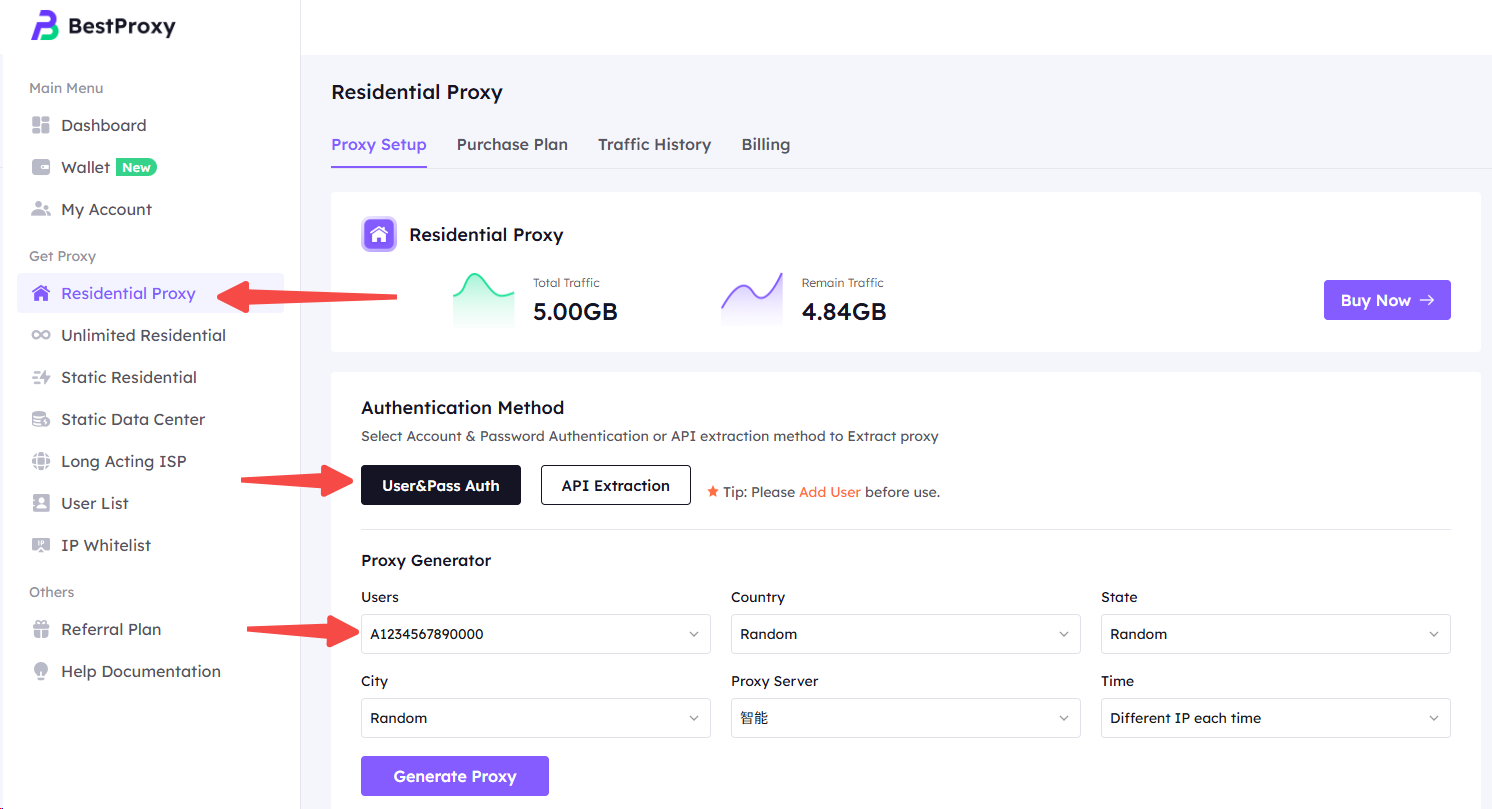
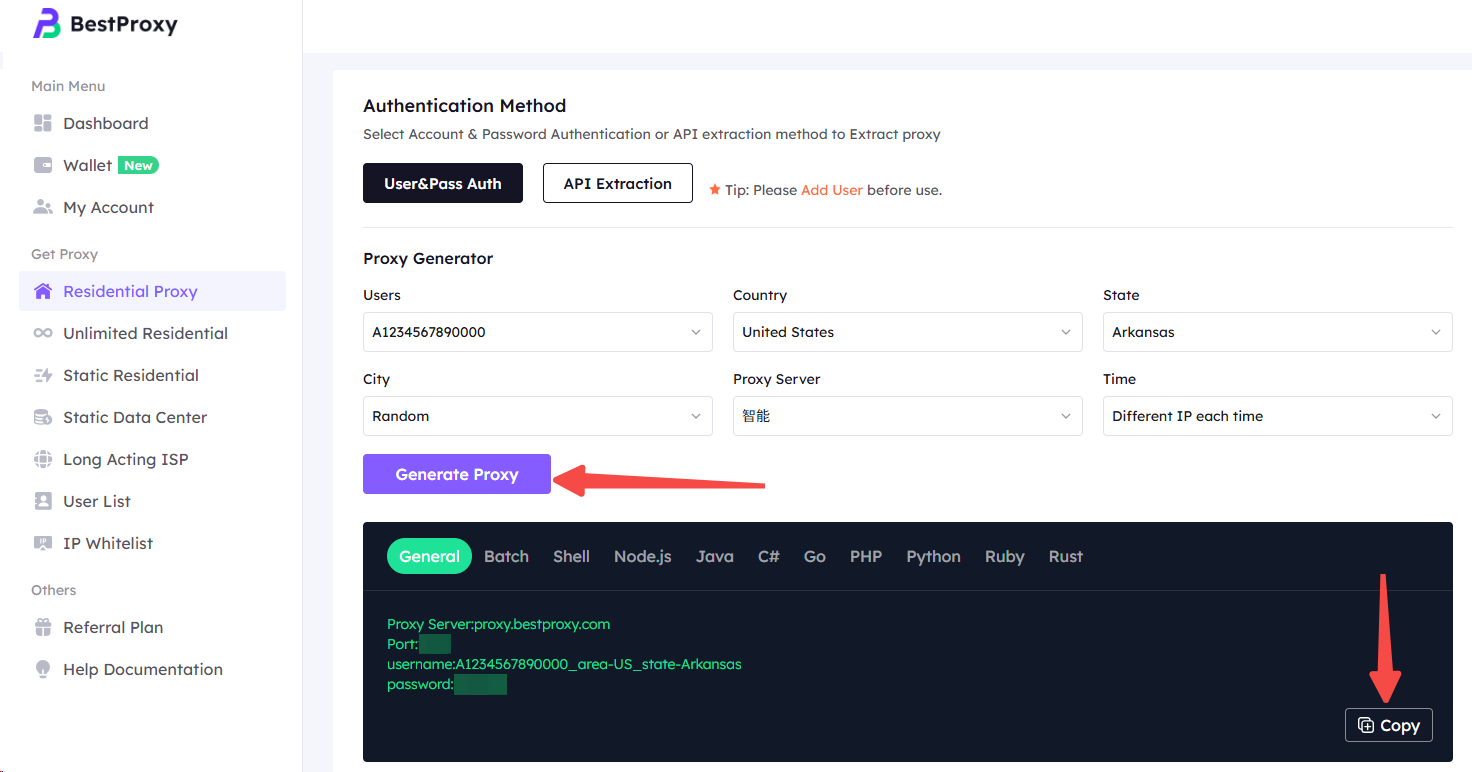
8. Then select the "Country" and "State" where you want to generate proxies, and you can choose the time according to your needs.
Here is an example from Alabama, USA.
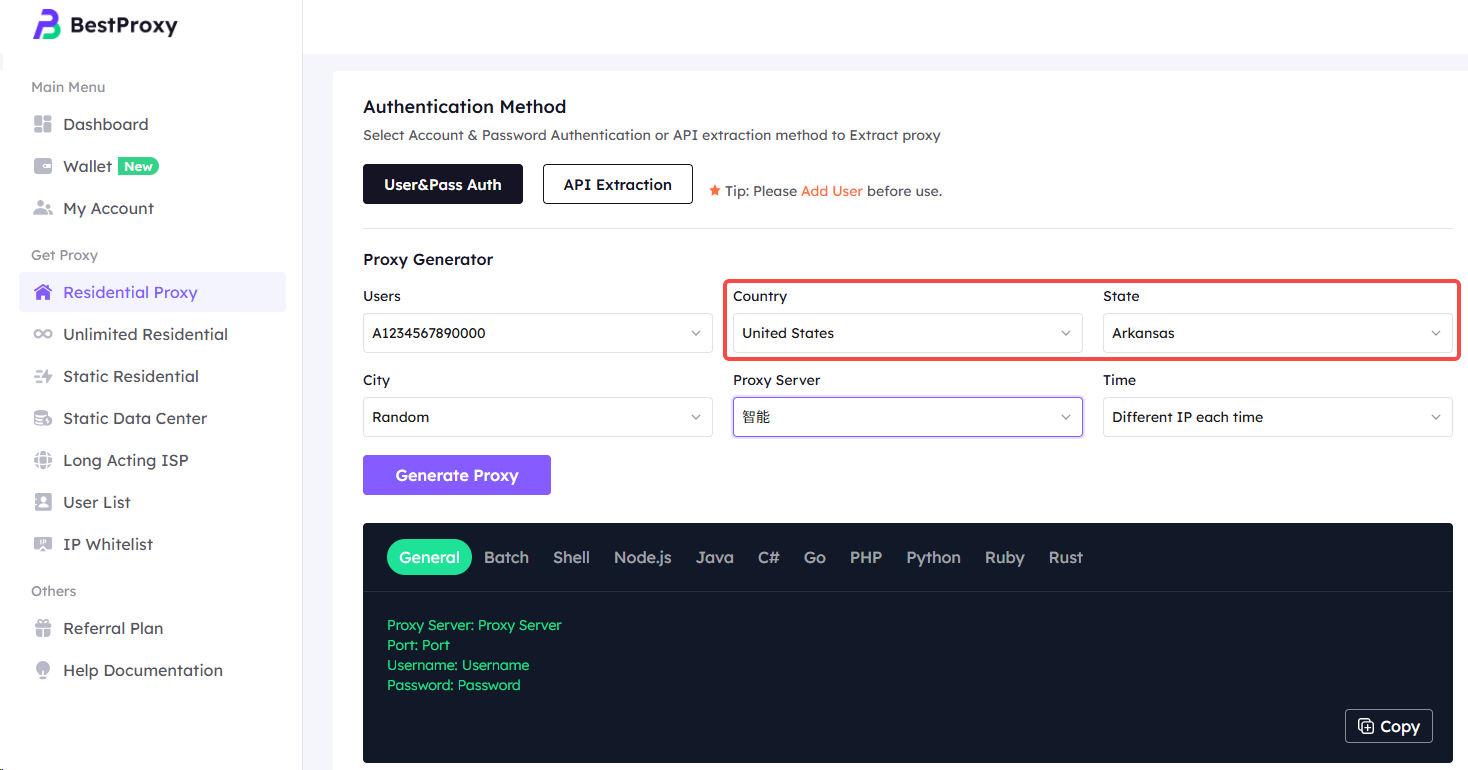
9. Finally, click "Generate Proxy" below, the proxies address and port will be generated as well as the account password. Finally, click "Copy", the extraction is successful.
Step 3: Set up the BestProxy Residential Proxies in the Genlogin browser.
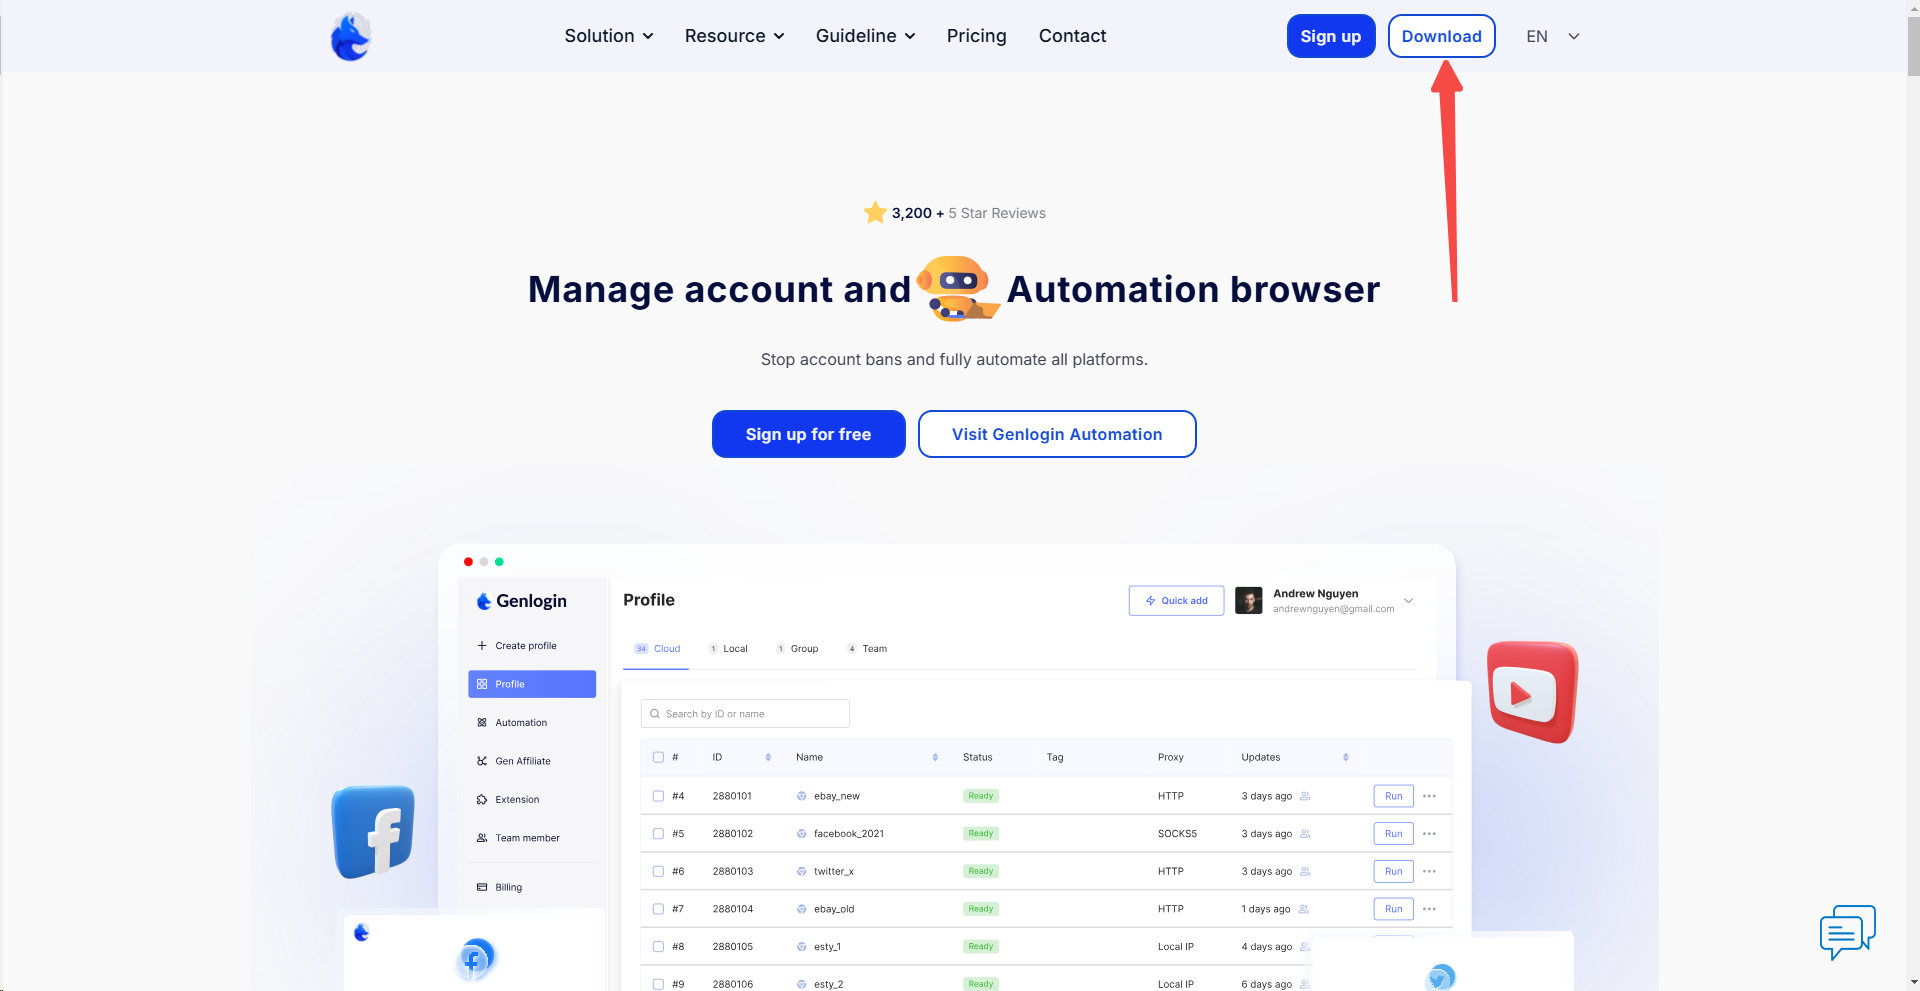
1. Visit the Genlogin official website, click the upper right corner to download and install Genlogin.
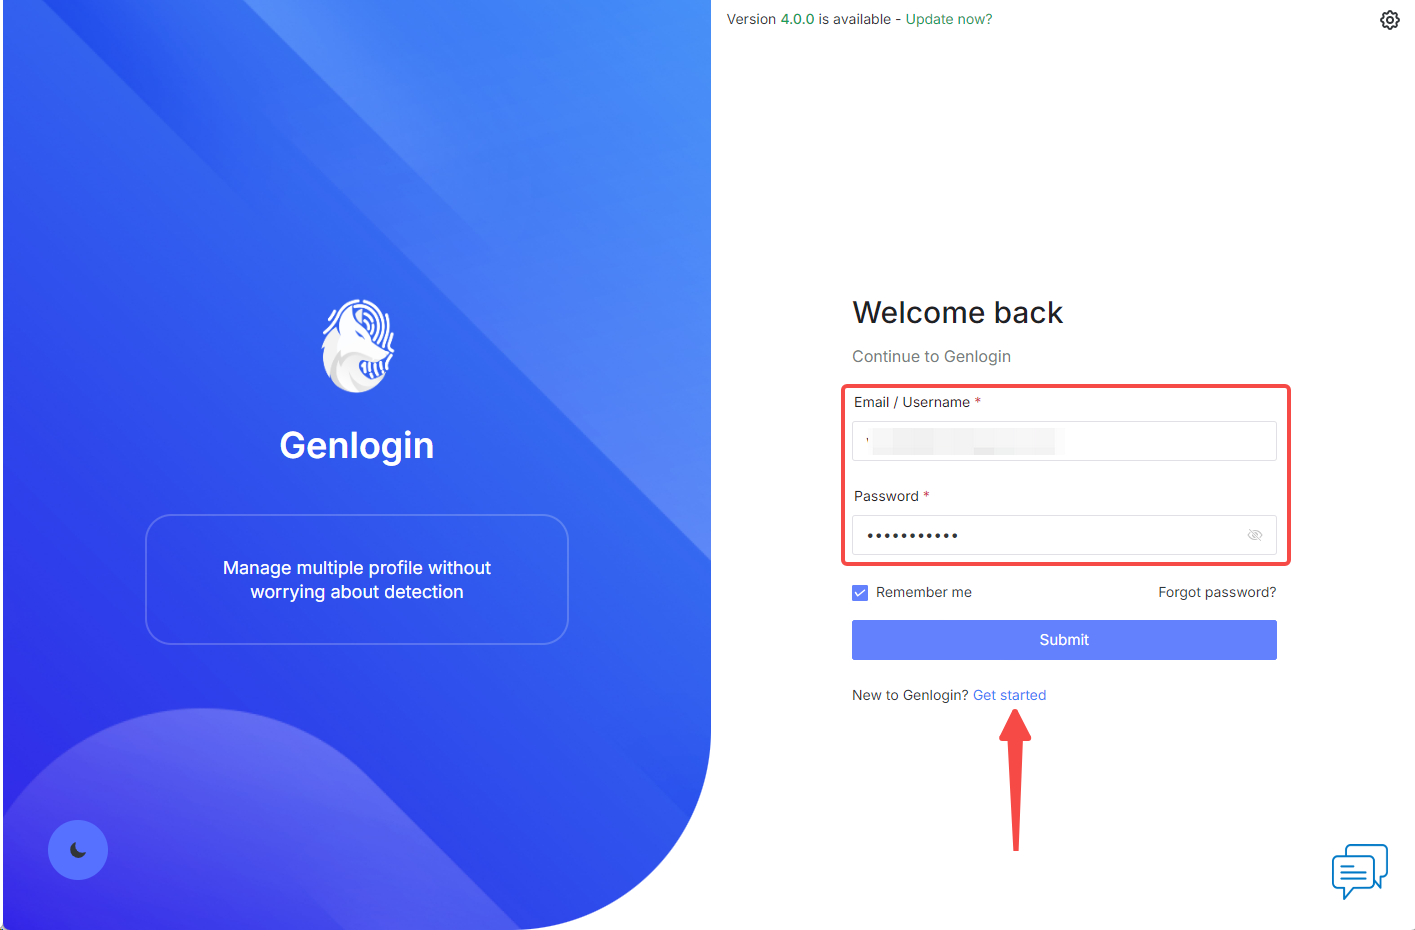
2. Open Genlogin, register and log in.
3. After logging in, click "Create Profile" in the upper left corner to create proxies.
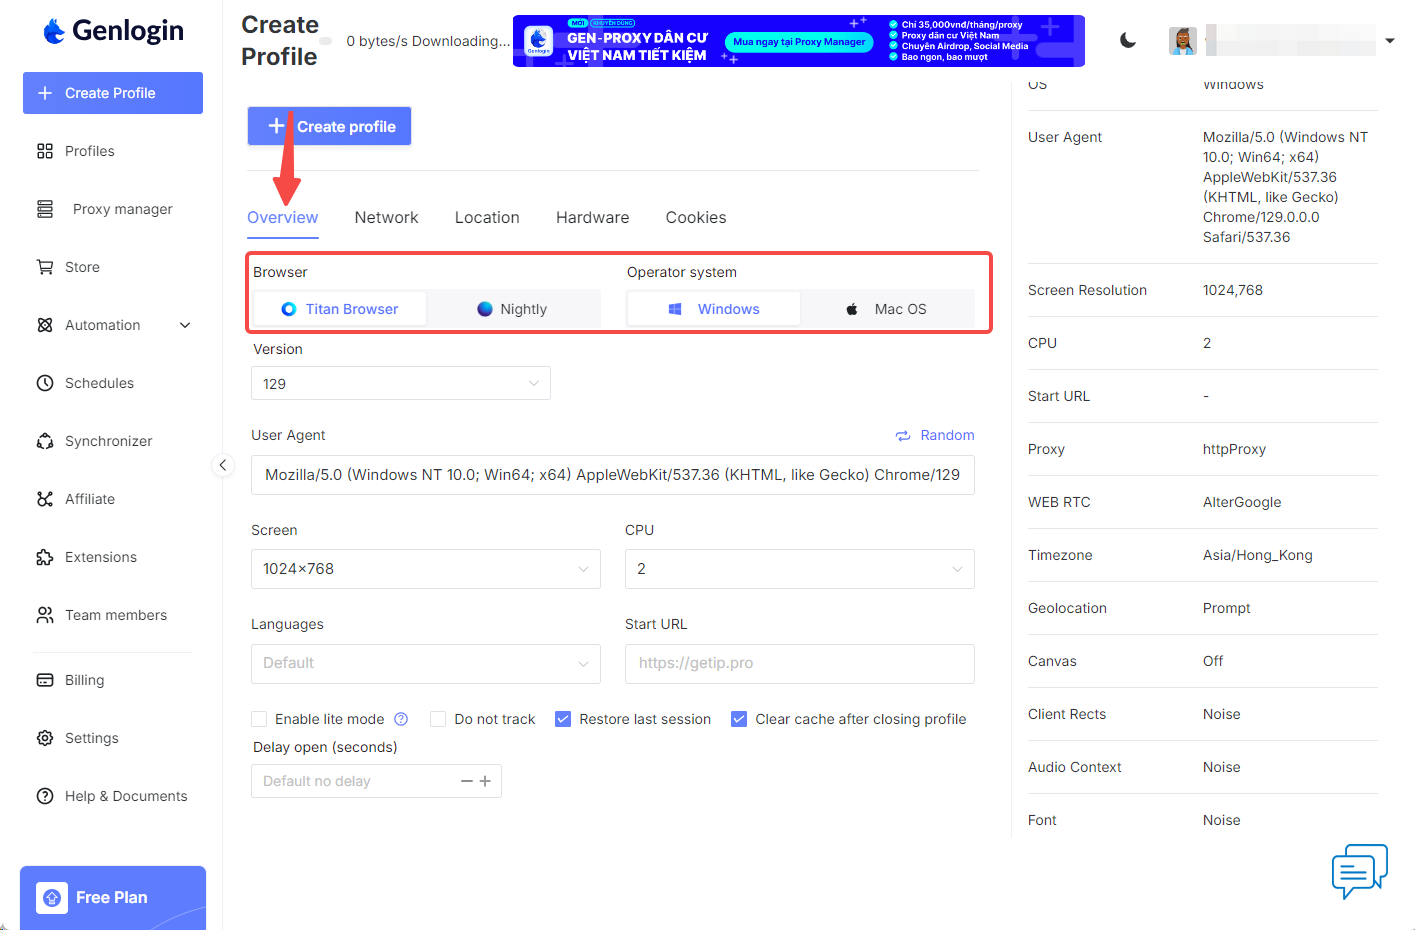
4. On the overview page, you can select a browser and an operating system. Here TitanBrowswer and Windows are used as examples.

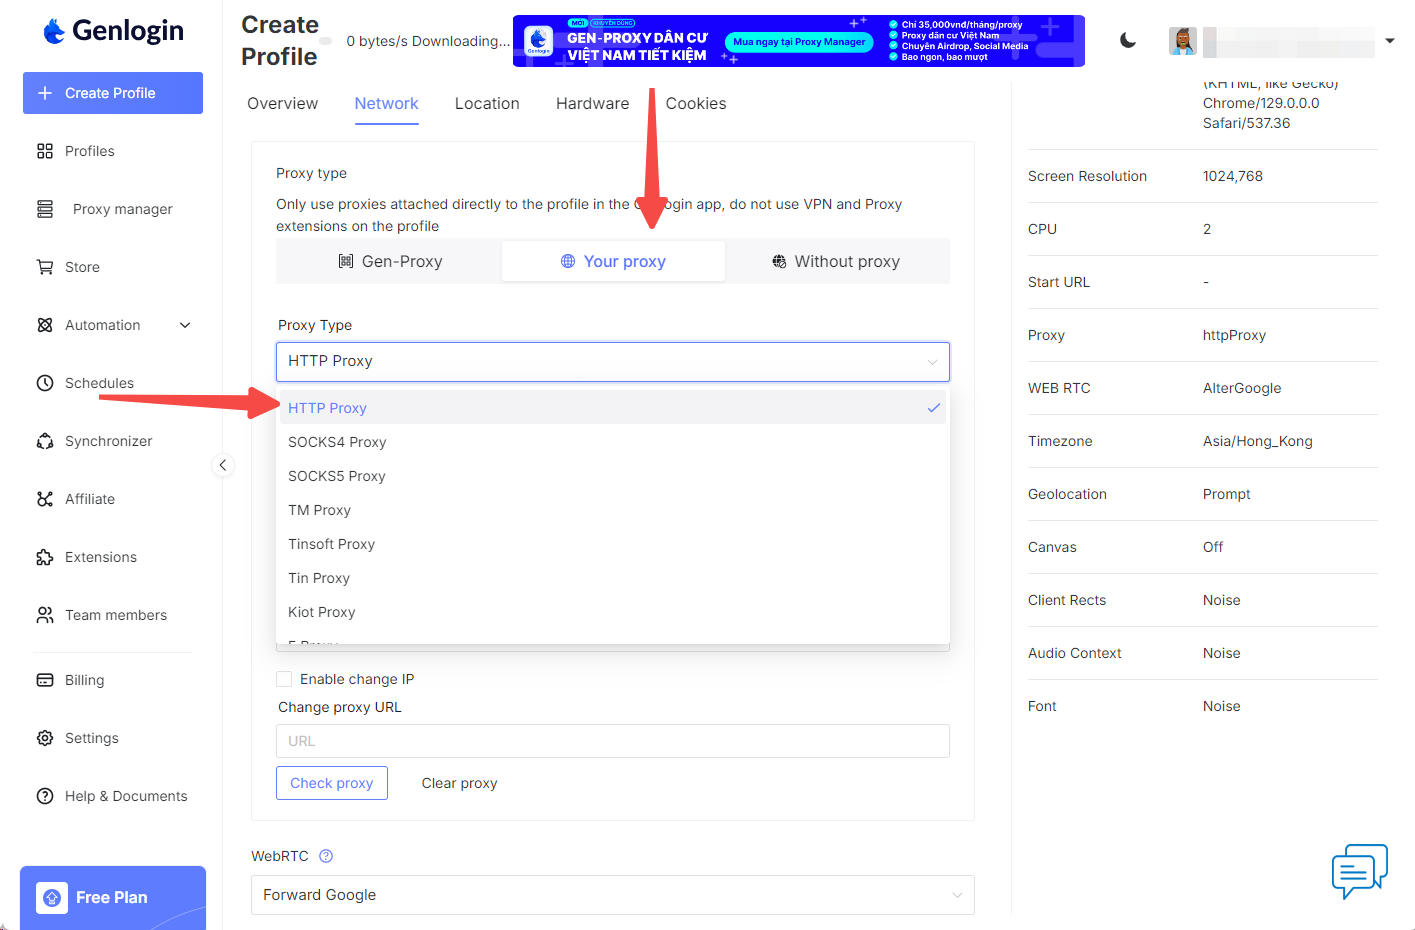
5. After the selection is complete, click "Network" on the right, "Your Proxy", and select "HTTP Proxy" in the Proxy Type.
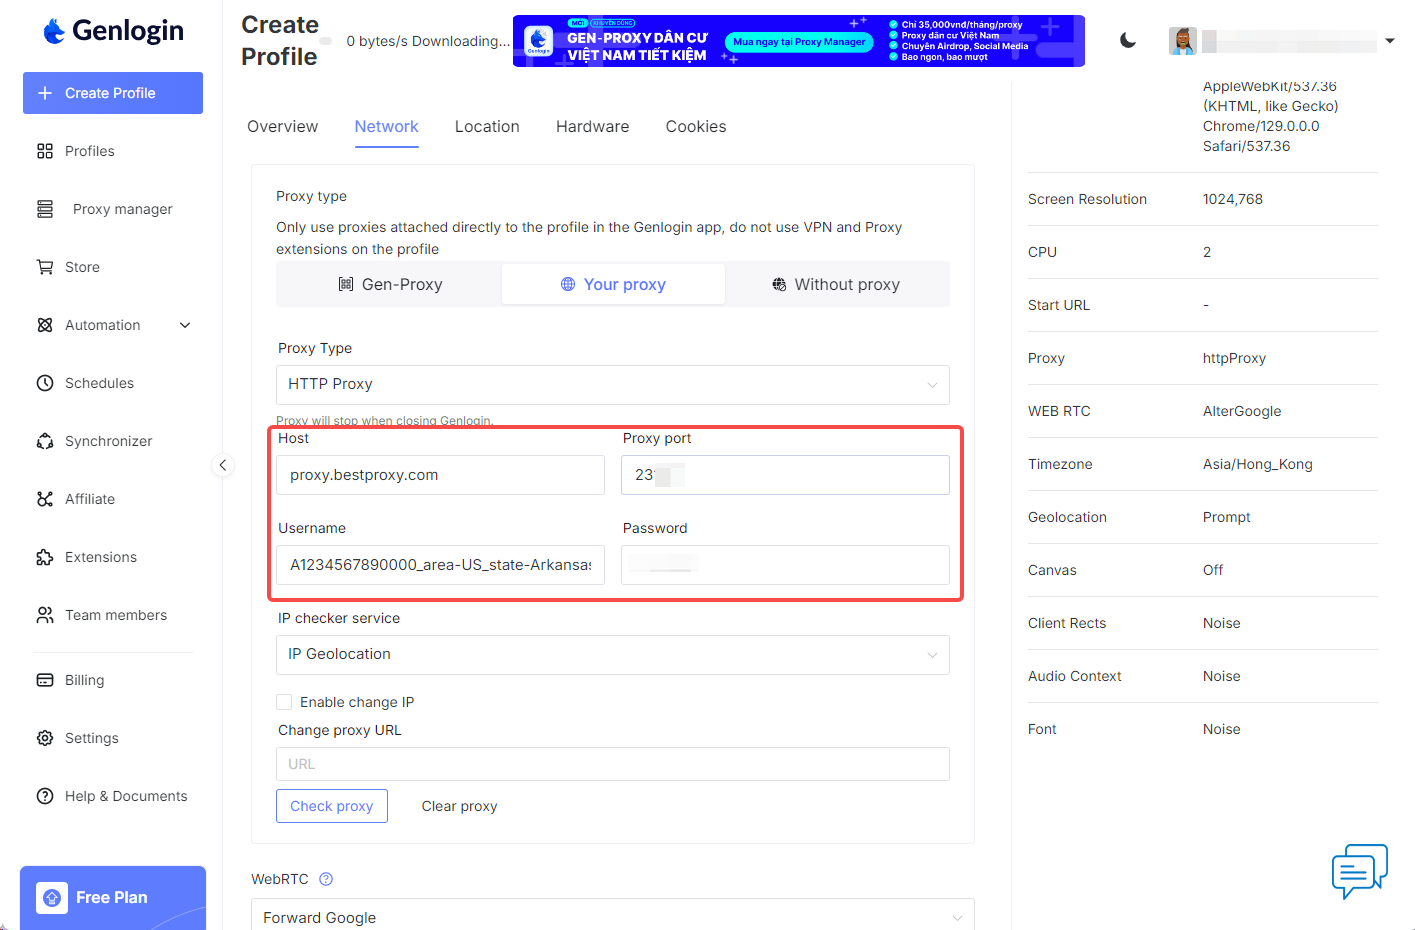
6. Then enter the Proxies Host, Port, Username and Password that you just generated in BestProxy proxy.
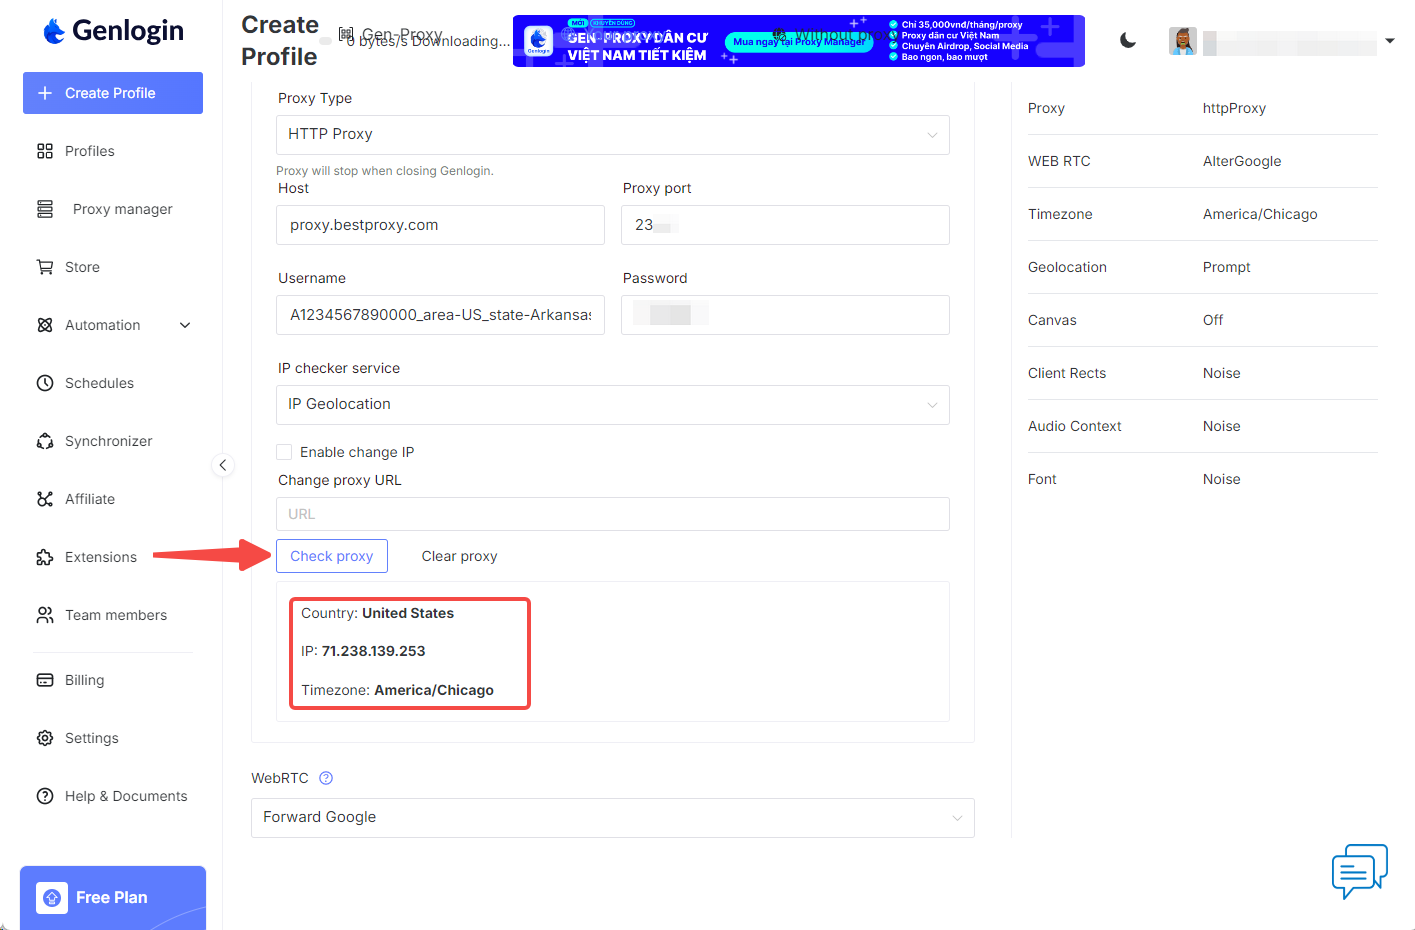
7. Scroll down and click "Check proxy", the message "Proxy Connected Successfully" appears, which means the setting is successful.
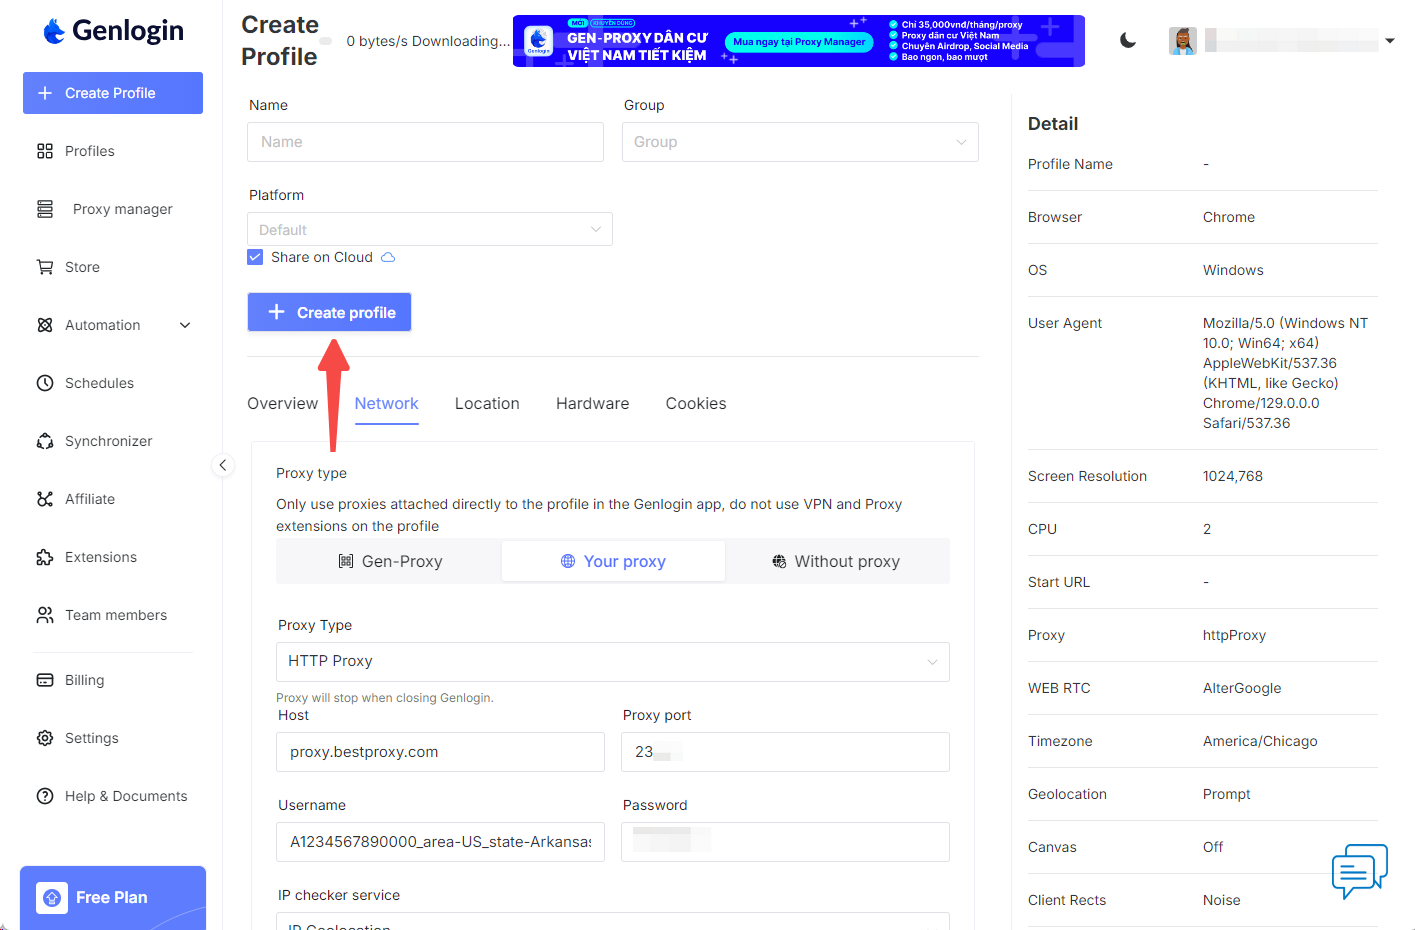
8. Finally, at the top, "Create profile" will be created successfully.
Step 4: Use BestProxy Proxies in Genlogin.
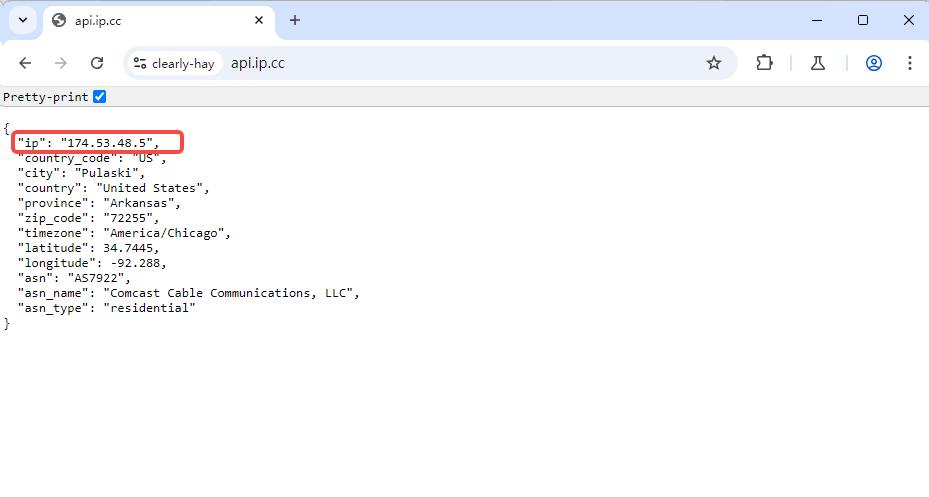
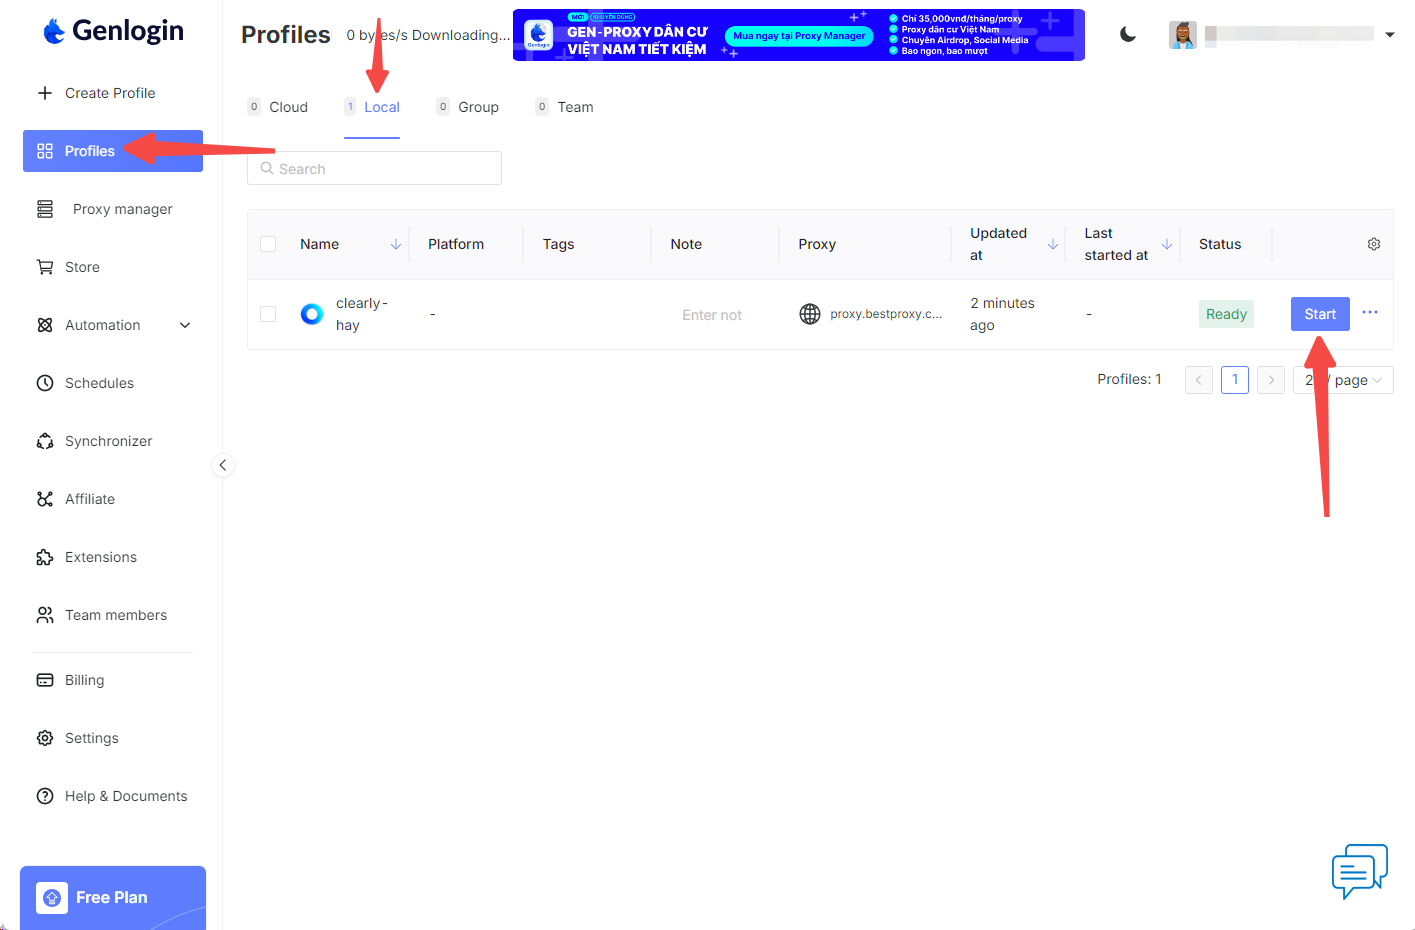
1. Back to the main interface, click "Local" on the right side of the Profiles. Open the Porfiles you just added.
2. After opening, visit the IP Address Checker website and make sure the IP address displayed has been changed to the Proxy Service's IP address, and the setup is successful.